 Thought I’d share a peek behind the scenes of the cookbook development process — as kind of a complement to my recent About.com articles on publishing cookbooks.
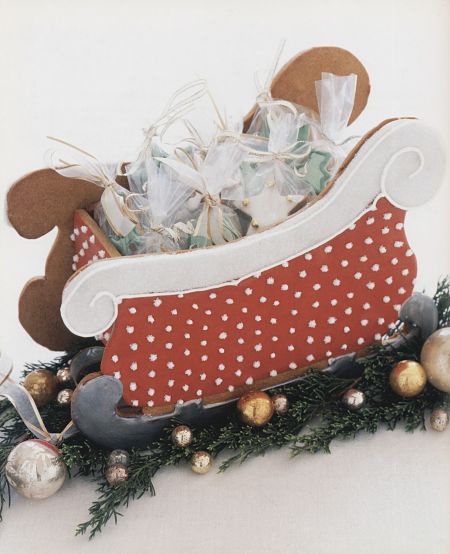
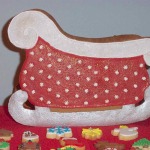
My first book, Cookie Craft, features the three-dimensional gingerbread version of Santa’s sleigh (pictured at left), which can be used as a holiday centerpiece or even an Advent calendar.
I recently unearthed the process shots that my co-author Janice Fryer and I took while we were developing the pattern and the technique. These were then used by Alison Kolesar, one of our brilliant illustrators, to create the step-by-step illustrations.
So… here’s a behind-the-scenes photo gallery – a look at both how we developed the sleigh and how cookbooks are “crafted.” Notice for the final sleigh creation and the photograph in the book, the food stylist (someone on Sara Neumeier’s team) chose to use piped, sugared dots rather than the snowflakes that we used in the original.
P.S. Our publisher Storey / Workman is featuring Cookie Craft Christmas the e-book version among the books discounted in their December special promotion. For lots of holiday cookie inspiration at a bargain price, check out the Workman Blue Plate Special, here.
-

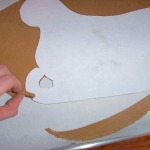
- Here’s a preliminary sketch of the Cookie Craft Santa’s sleigh template… the authors’ minds at work!
-

- The gingerbread sleigh’s sides, front and back are measured. These were refined for the templates in the book.
-
- The template is laid on the rolled out gingerbread and the shape is cut with a sharp knife. The excess is peeled away and rerolled. The tempate is flipped to cut side #2.
-
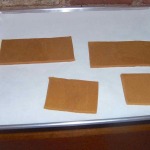
- The “box” seat pieces of the cookie sleigh are cut out. Also – the scraps from the recipe are great for cutting out mini-gingerbread cookies for the advent calendar.
-
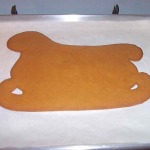
- The baked gingerbread sleigh side.
-
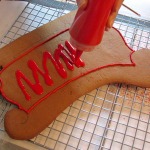
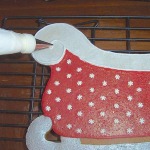
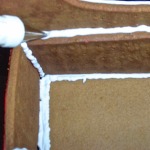
- The sleigh sides and front and back of the “box” are piped and flooded…
-
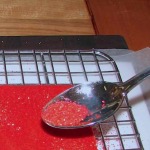
- For some sparkle, we add red sanding sugar to the wet flood icing.
-
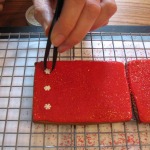
- The sugar snowflakes are added when the icing is still wet. We used a long tweezer and pressed the flakes in firmly.
-
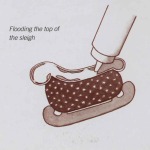
- Here’s Alison Kolesar’s illustration of flooding the top of the sleigh detail.
-
- When the main iced and embellished part of the sleigh is completely dry (overnight is best), the top of the sleigh is piped, filled and dried to the touch. Then, additional piping detail adds dimension. The blades of the sleigh are painted with silver luster dust.
-
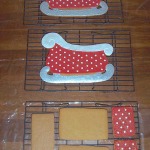
- Drying sleigh pieces — they need to dry completely before assembly.
-
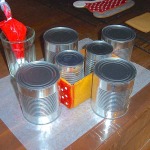
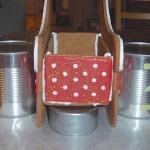
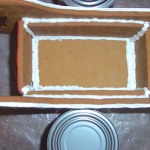
- The sides of the sleigh “box” are “glued” together with royal piping icing. Cans help keep them stable while they dry.
-
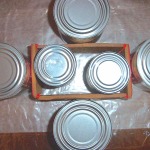
- Aerial view of the drying box sides. When the sides of the box are dry, the bottom is glued on.
-
- The box is “iced” to the sides of the sleigh.
-
- Again, large cans keep the structure stable when drying.
-
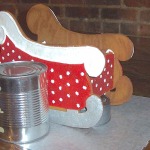
- Tuna cans underneath the gingerbread sleigh support the bottom.
-
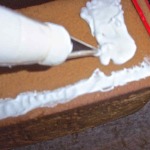
- A little piping icing puts a finishing touch on the sleigh’s inside.
-
- Another view of the drying cookie sleigh.
-

- We filled our sleigh with mini cookies… these are sugar, but the gingerbread recipe allows enoough dough to make 24.
-
- Here’s our finished sleigh with the cookies.
-
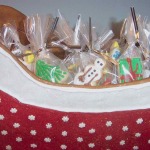
- Which we individually wrapped, so for a centerpiece, it looked like this…
-
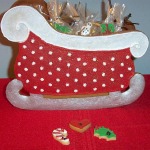
- For an Advent “calendar” we numbered the cookies.
Leave a Reply